Build a Simple Garden Bench With 2×4 Lumber
It’s easy to make an sturdy and attractive garden bench in a weekend for around $30

Finished bench ready for sitting
Out front we have a patio area where a wood bench about decade past its prime sat rotting away. I knew I had to replace it, but I’m cheap, so rather than spending $100 or more to buy a new one, I’d just make my own.
Aside from being cheap, I’m also image-conscious and lazy, so I wanted something that would look nice but wouldn’t take too much time or effort to build. Fortunately, I had a few 2×4 studs from a previous construction project tossed on the side of the house, and that turned out to be all I needed to make a nice, five foot bench. Better yet, even if I had bought new lumber, the total cost with wood, stain and hardware was less than $30.
Here’s how to build your own 5 foot long bench in just a weekend.
Supplies You Need
Lumber
- 7 — 2x4x96″ studs (you can use 2x4x92½” as well if you don’t mind a smaller spacer piece)
Tools
- Drill & small drill bit
- 24″ bar clamp (optional but recommended)
Supplies
- 1 — Box of 3″ exterior screws
- Exterior wood glue
- Stain or wood sealer
All of this is available at your local hardware or home improvement store, and shouldn’t cost you more than $30 total.
What You’re Building
Top View (click image to enlarge)

Side View (click image to enlarge)

Looking at drawing of the top of the bench, you can see it’s just five 2×4 studs cut to 60-inch lengths spaced apart with 18-inch pieces. The side shows the legs are made from four 2×4 pieces* and mounted to the bench’s seat by a couple of cross-pieces also made from cut 2x4s.
Total time to cut and assemble shouldn’t be more than 3 hours. Add staining and dry time, and you can have a great new bench in a couple of days.
Step-by-Step Instructions
Step 1 – Cut the wood
Your cut list:
- 5 – 60″ long pieces (bench seat)
- 8 – 18″ long pieces(bench seat spacers)
- 4 – 16″ long pieces (legs)
- 4 – 15½” long pieces (supports)
The first thing we want to do is cut the long pieces of the bench seat. Take five of your 2x4s and cut them to 60″ (5 feet). Once you’ve done that, set those pieces aside.

Cut five of the 2x4s to 5 feet long
After you’ve cut those long pieces, you’ll now also have five trimmed pieces that are each 36″ long (unless you’re using 92½” lumber, in which case they’ll be 32½” long). Take four of these 36″ pieces and cut them in half to make eight pieces each 18″ long. These are going to be the spacers between the long pieces.
Next, grab your remaining two uncut 2x4s and cut four 16″ pieces for your bench’s legs, and four 15½” pieces to make the bench support and leg mounts.
Once you’ve got everything cut, set the legs and support pieces aside so you can work on making the bench seat.
Step 2 – Assemble the bench
Measure and mark where your spacers will go

Measure and mark where to line up the spacer pieces
Align all five of your newly cut 60″ bench pieces (you can see I just used a piece of 2×4″ to do this) and use your tape measure and a pencil to mark 6″ from both ends of the bench pieces. This will be where you line up your spacer pieces.
Drill pilot holes for the screws

Drill pilot holes for the screws
Now get all 8 of your spacer pieces and drill pilot holes about 3″ from both ends of each piece. Once you’ve done that, get one of your 60″ bench pieces and set it aside. This will be the front of your bench. Take your four other 60″ pieces and drill pilot holes 10″ in from both ends.
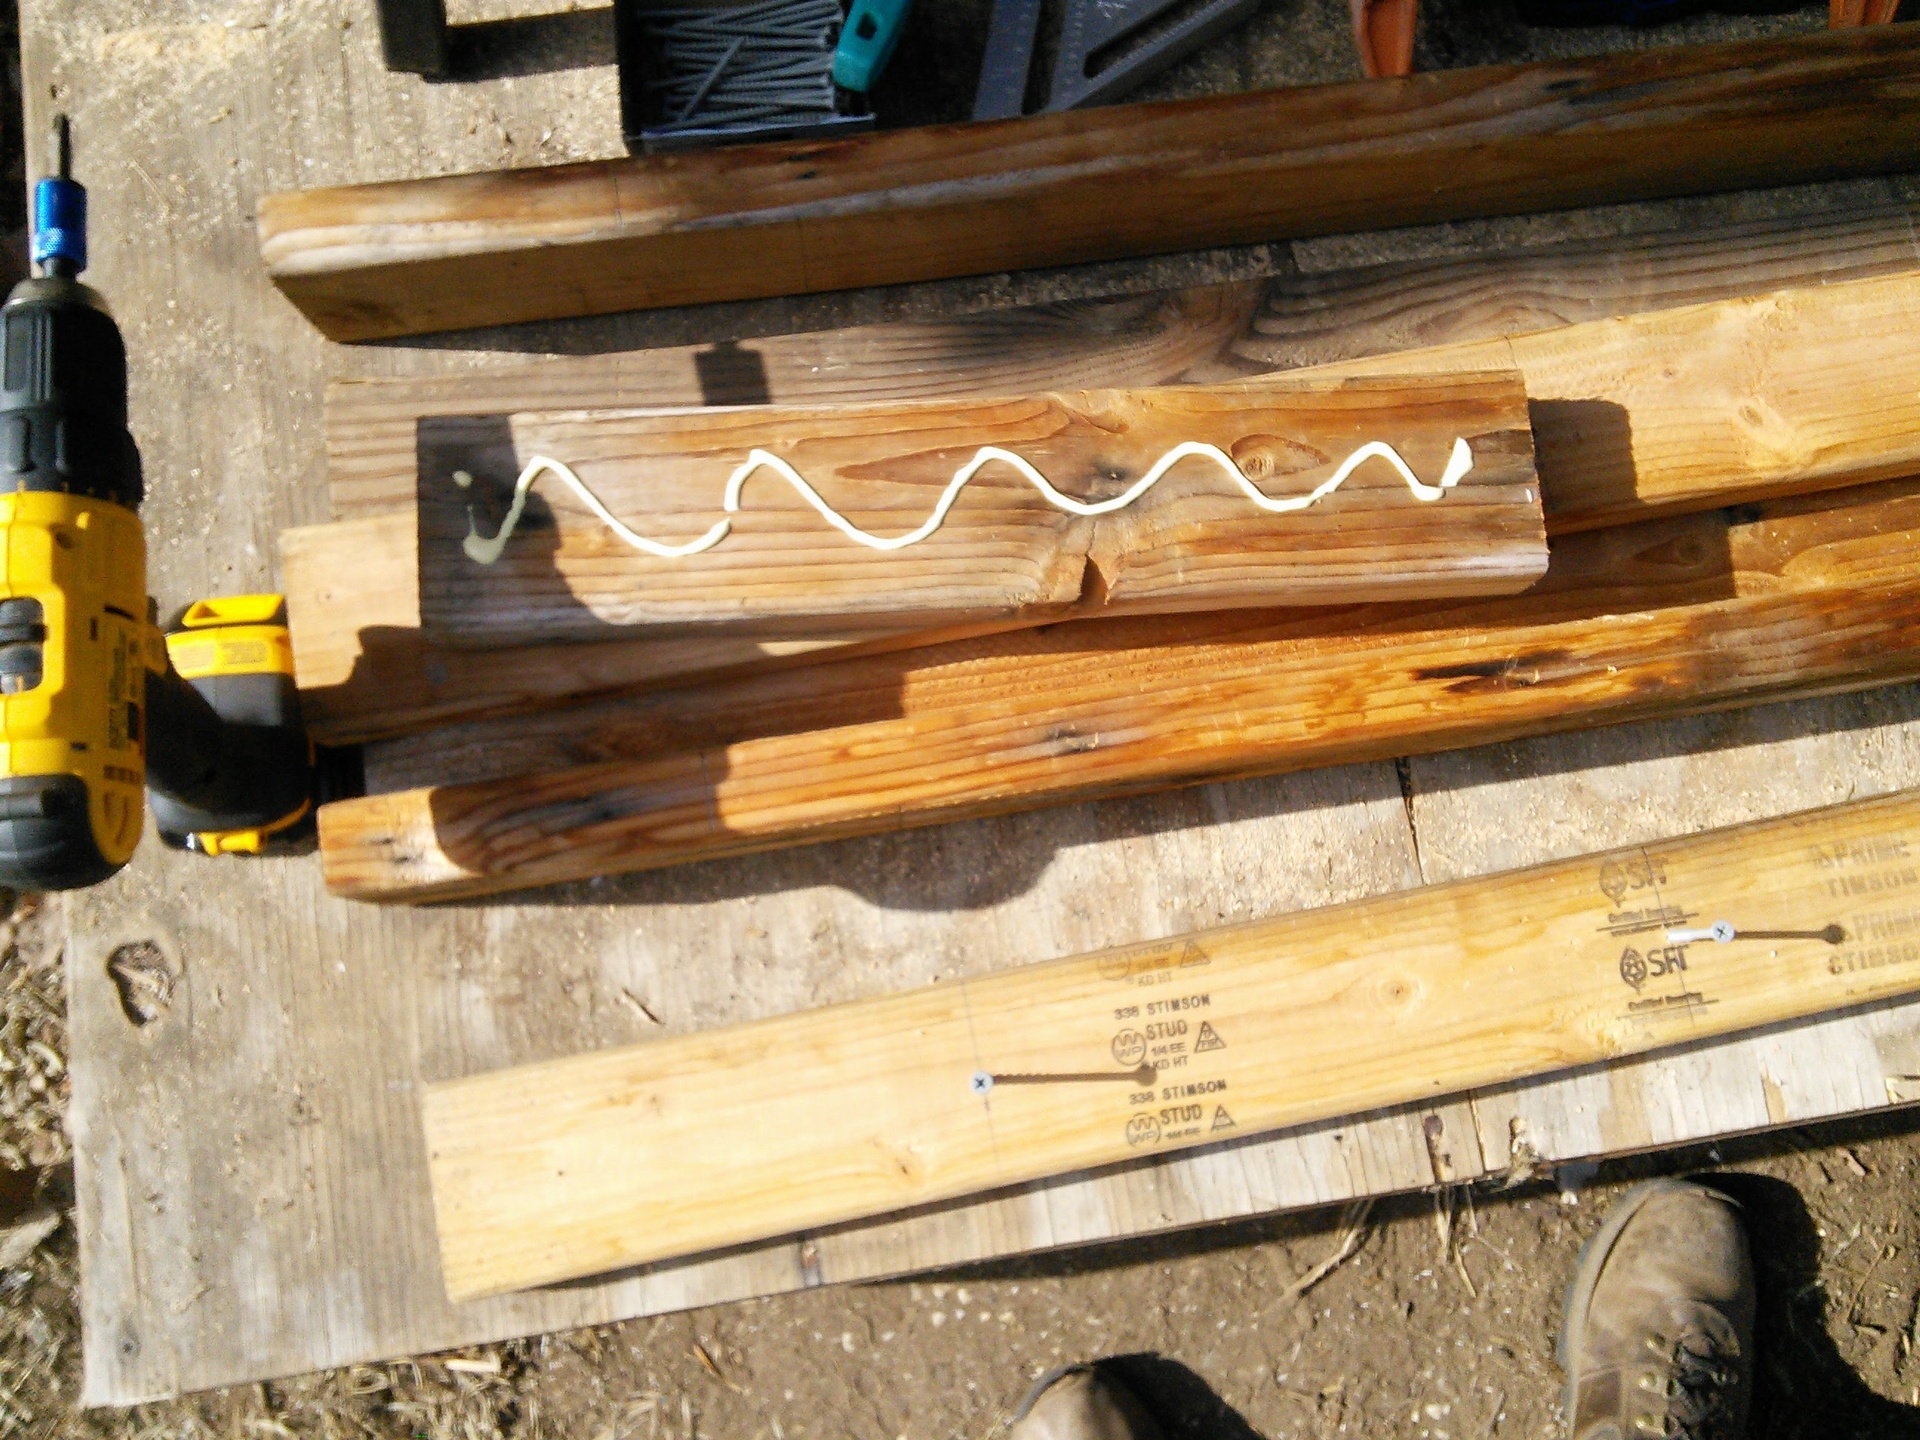
Glue and screw the bench pieces

Screw through the pilot holes to assemble the bench
Now line up the end of the spacer piece with the mark you made 6″ from the end of the long pieces and screw the two pieces together. For extra strength, run a bead of glue on the spacer before screwing it to the long piece. (You can see I used a 24″ clamp to keep the pieces from separating while I was screwing in the screws.)
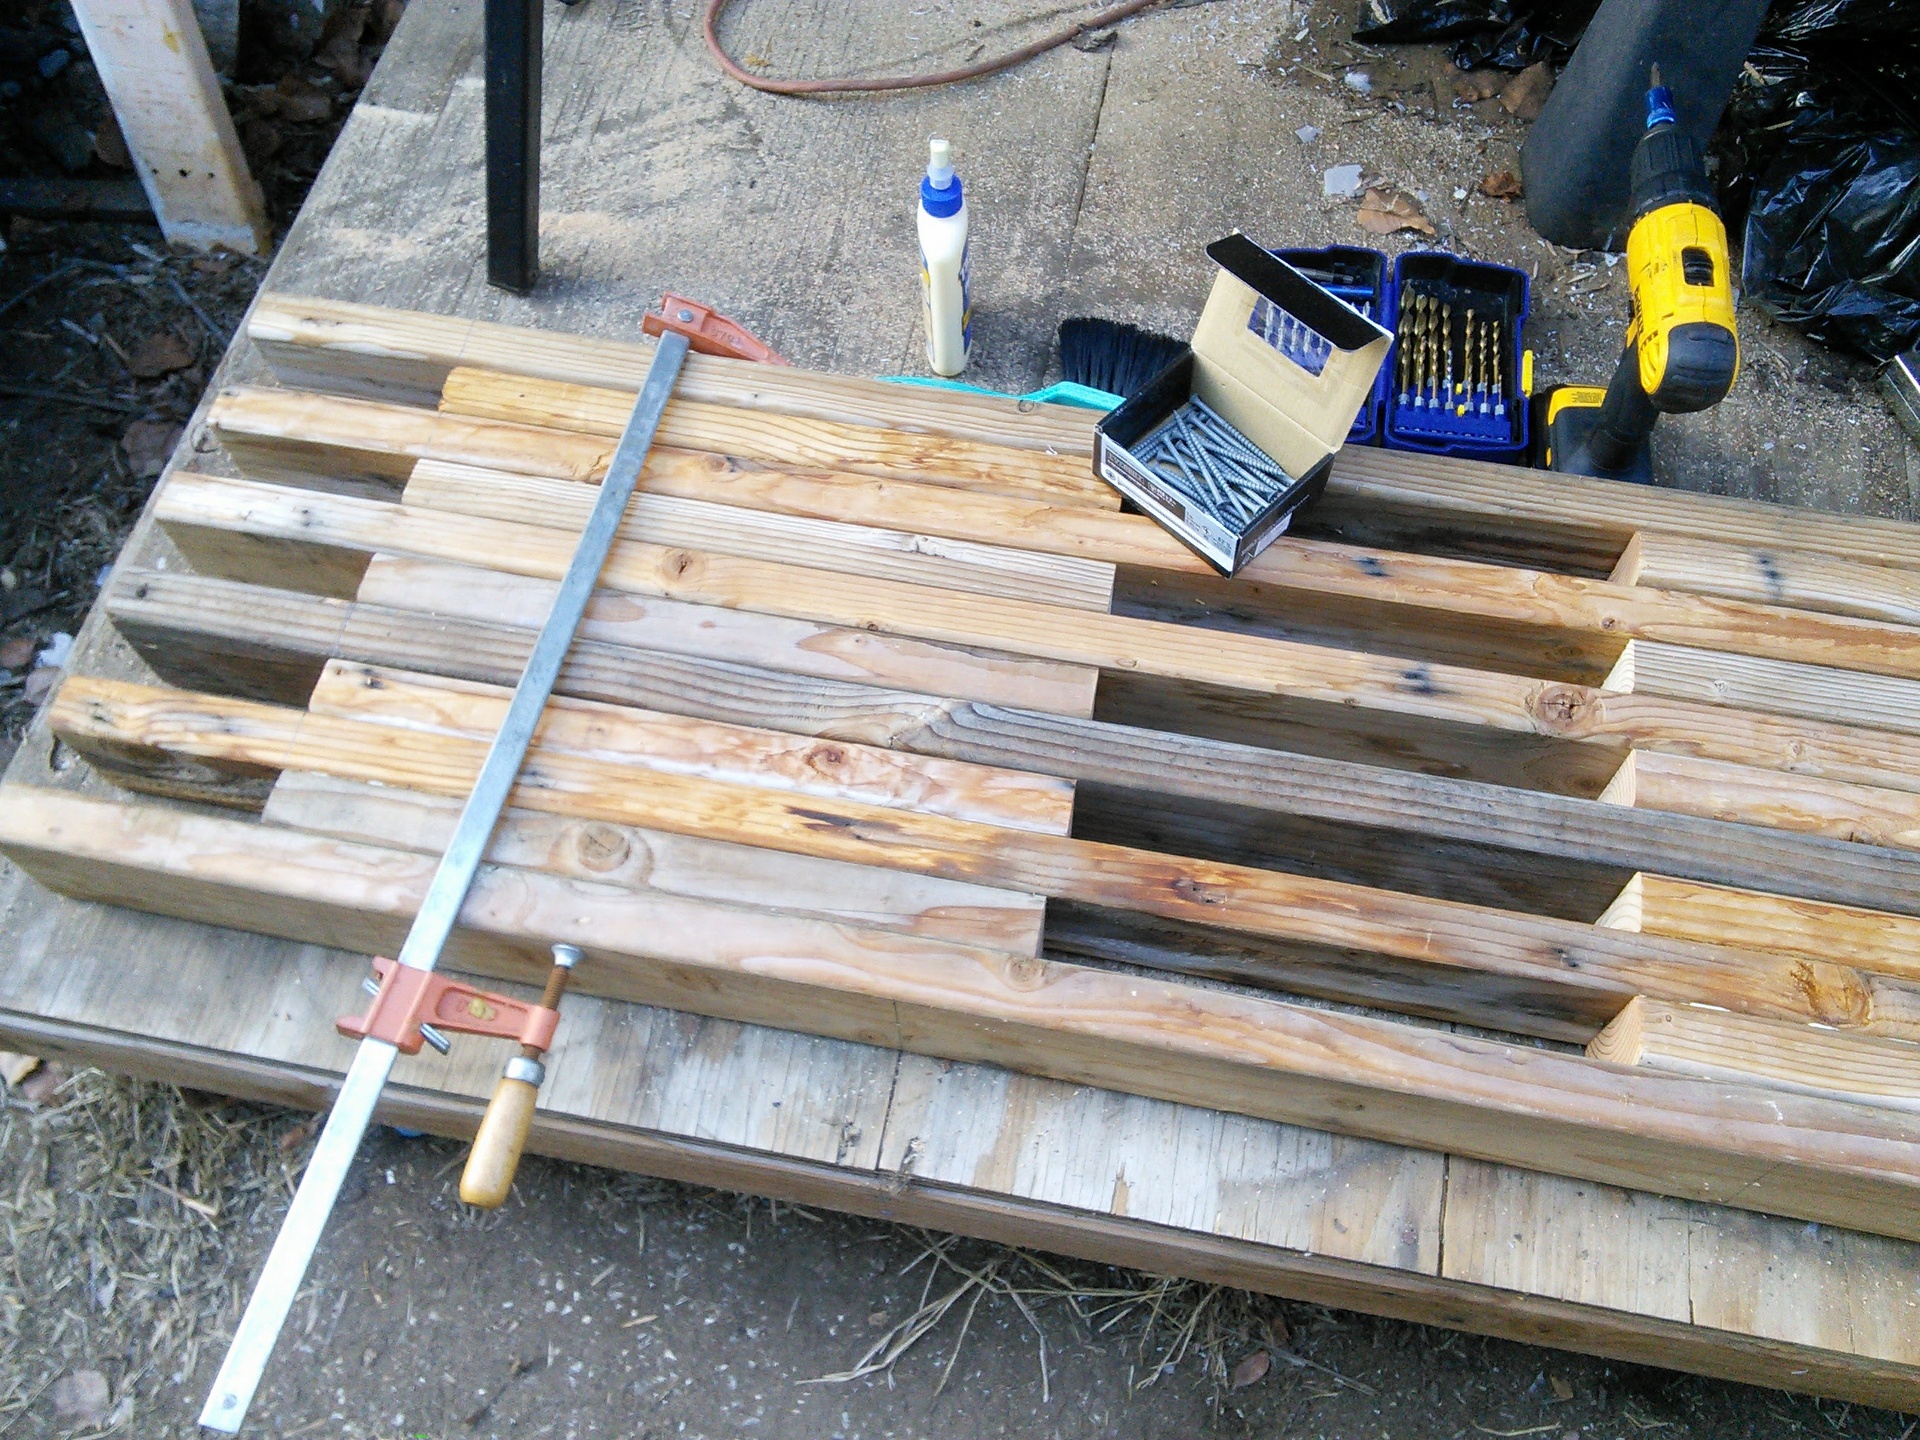
Once you’ve got all your pieces screwed together, your bench is pretty much assembled, so you can move it aside.
Assemble your bench supports

Screw and glue two 15½ ” pieces together
Grab the four 15½” long pieces you cut back in step one. Take two pieces and place them edge to edge in an “L” shape like you see in the photo. Align the ends and glue and screw them together. Do the same for the remaining two pieces.
Now give your bench and supports a few hours to let the glue dry.
Step 4 – Stain / Preserve the wood

Bench fully stained and drying
Once your bench’s glue is dry, it’s time to stain and seal it. If you like your wood in a natural color, you can simply use some wood waterproofing to seal it. It doesn’t rain much here in San Diego, so I’m not all that worried about waterproofing, but the termites and ants are tough on unsealed wood, so I like to use treat my wood with a combination stain and wood preservative that will make the bench waterproof, bug proof and give it a nice, rich reddish-brown color.
Once you’ve stained and sealed the bench seat, legs and supports, let everything dry for 24 hours.
Step 5 – Attach the legs

Screwing the supports into the bench
Once everything is dry you’re ready for final assembly. Take the bench seat and lay it down so the underside is facing upward. Then use your measuring tape and pencil to measure and mark 12″ in from both ends. These will be your alignment marks for the bench supports / leg mounts.

Attach the legs to your bench using the supports and screws
Run a bead of glue and screw both supports to the underside of the bench as you see in the illustration above. Once that’s complete take one of your bench legs and run a bead of glue along the top and side where it will be screwed to the support. Then screw two screws through the support and into the leg as shown in the illustration. (For a good strong glue bond, drill a couple of pilot holes in the support and use a clamp to hold the leg to the support while you screw the pieces together.) Repeat the process for the remaining three legs.
After you’re finished attaching the legs, leave the bench so the glue can dry for at least 24 hours.
Finish
Once the glue is completely dry, flip the bench over and stand it on its legs (get someone to help you if necessary) on a level, even surface. Test it to make sure it feels solid and doesn’t rock or wobble. (If it does, check to make sure that the leg screws are firmly set. Fresh lumber can get spongy and make screws loose.)
Once it’s passed QA, you’re all set. Now you’ve got an inexpensive and attractive bench that will last your for years to come!

Finished bench ready for sitting
Footnote: As you can see in the photo, I made a slight change to the bench design. Rather than using 2x4s for the legs, I used a couple of 6×6 pieces I had leftover from a deck project. The only change I had to make to accommodate these legs was to center the bench on them rather than lining it up on the edge.


