Let’s Get Cloning
Winter is a great time to propagate plants from cuttings

Salvia Pozo Blue propagated from another in my yard
Mid winter is tough. If you’re anything like me, right about now you’re itching to get back outdoors, clear some garden beds and get started on planting for spring. The problem is there’s still weeks of cold, wet, frosty and unpredictable weather ahead that all but guarantee anything you try to get started will be killed off by the time warmer weather rolls around.
Fortunately, while it may not be the best time to get seedlings or transplants started outdoors, it is a great time to propagate new plants–especially woody shrubs, trees and vines–from cuttings (aka “cloning”). Cloning is easy and a great way to expand your plant collection without spending money. And since a lot of tough or slow to propagate plants are either dormant or in a reduced growth phase while waiting for spring, the cold weather actually makes it easier to root them without the risk of heat stress or drying out that comes later in the year.
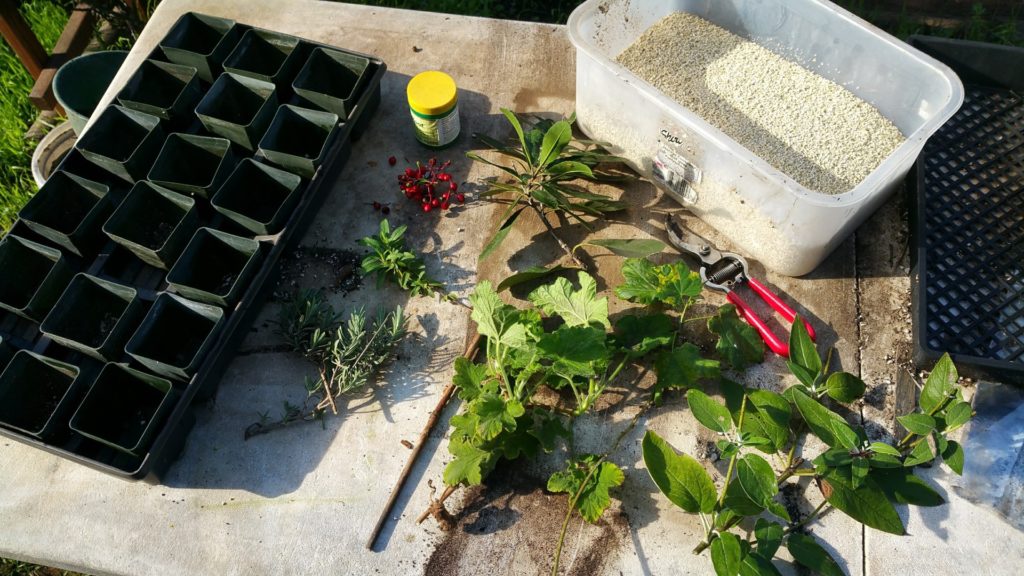
Here’s what you need to propagate your own cuttings:
- A planting tray or shallow tub with lid — I use standard 10×20” plastic trays with no drain holes Plastic planting trays on Amazon.com, along with a propagation dome (e.g., fancy word for “lid”), because they, like me, are cheap.
- A bag of vermiculite — available from your local nursery or garden center
- Rooting hormone — Optional, but I find it helps, especially with some of the more difficult to clone plants
- Water, scissors/clippers and a small, round stick
- Plant cuttings — brown wood from the previous years’ growth works best
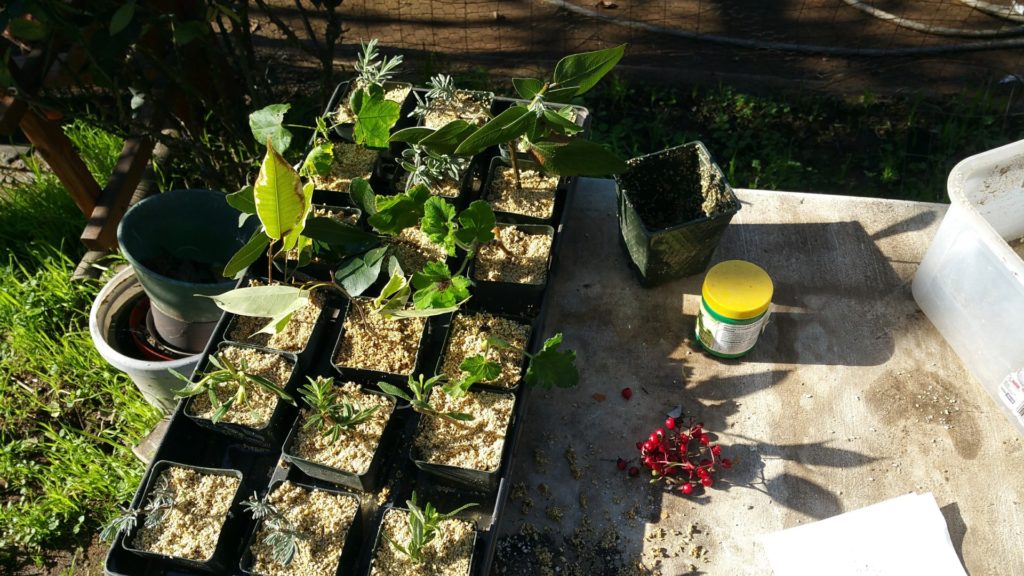
Step 1 – Collect your cuttings
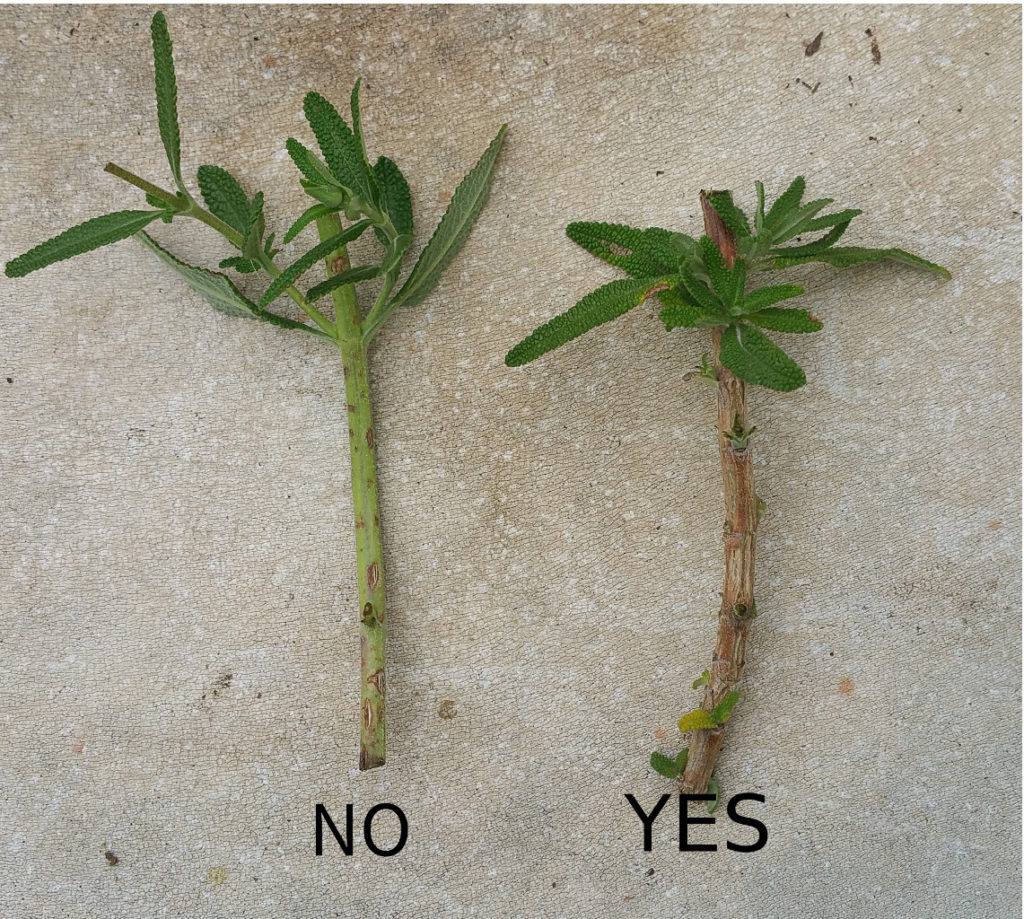
The first thing you want to do is collect the plant cuttings you’re going to propagate. You’ll want to cut a 3” to 5” piece, preferably brown wood that’s had a full year’s growth. Growth older than that tends to be slower to root, while young green wood tends to shrink and die off.
I’m in the process of establishing a lavender and sage garden at the south end of the property where it meets the nature preserve, so I took a bunch of cuttings from some native sages, Spanish lavender and a couple of other plants I have growing elsewhere on the acre.
After you’ve collected your cuttings, remove all but the top set of leaves and set them aside.
Step 2 – Prepare your tray(s)
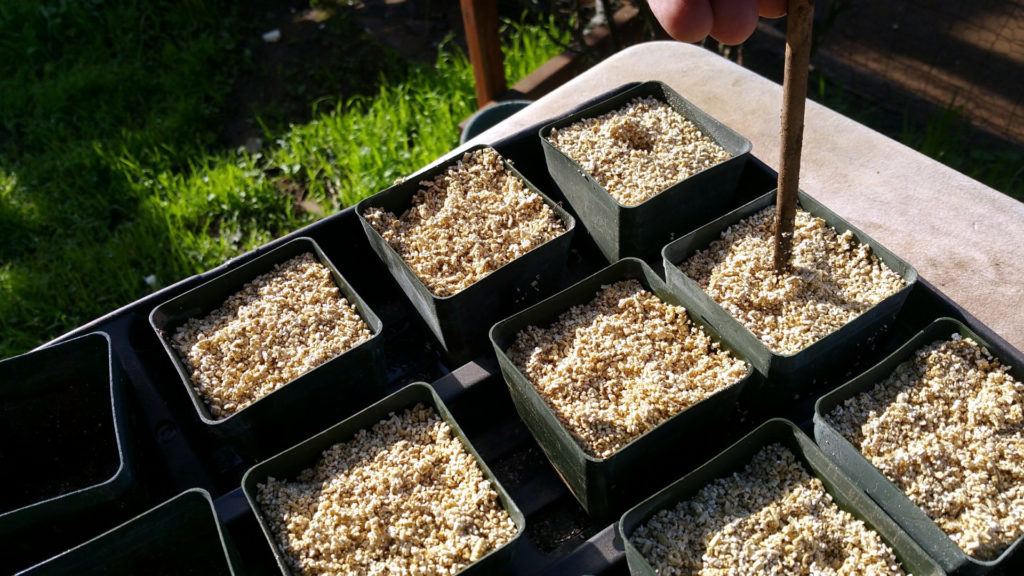
Fill your planting tray with vermiculite. I like to place 1” plastic pots in the tray and fill the pots with the vermiculite because it makes it easier to transplant the new plants later, but you can also just pour the vermiculite directly into the tray. Just make sure it’s at least 2” deep so the cuttings have plenty of medium in which to set roots.
After filing the tray, wet the vermiculite with enough water to make it stick together when you squeeze it. Once you’ve moistened the vermiculite, use your round stick to make a hole every few inches or so (or just one hole per pot if you’re using pots).
Step 3 – Dip your cuttings in the rooting hormone
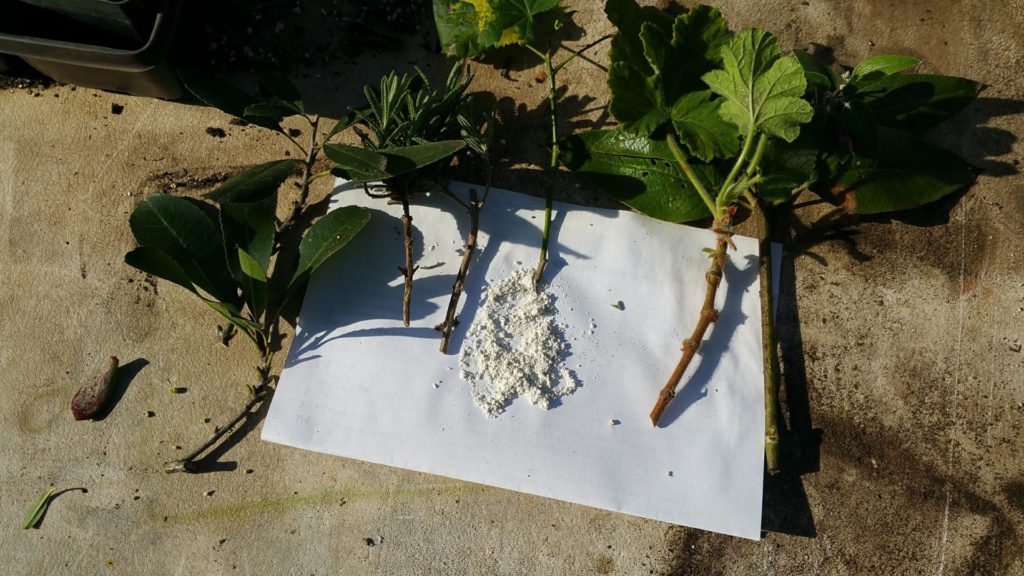
You don’t have to use it, but I find that some plants will root more quickly if you do. Here I’m using a powdered hormone which stick on the stems of rough surfaced cuttings like sages and lavender. If you’re trying to propagate plants with a smooth surface, a gel might adhere better.
Step 4 – Place the cuttings in the vermiculite
Carefully place each cutting into one of the holes you made in the vermiculite back in step 2. Insert it as deeply as it will go without forcing and then press the wet vermiculite in around the stem to ensure good contact between the cutting and the rooting medium.
Step 5 – Cover and place out of direct sun
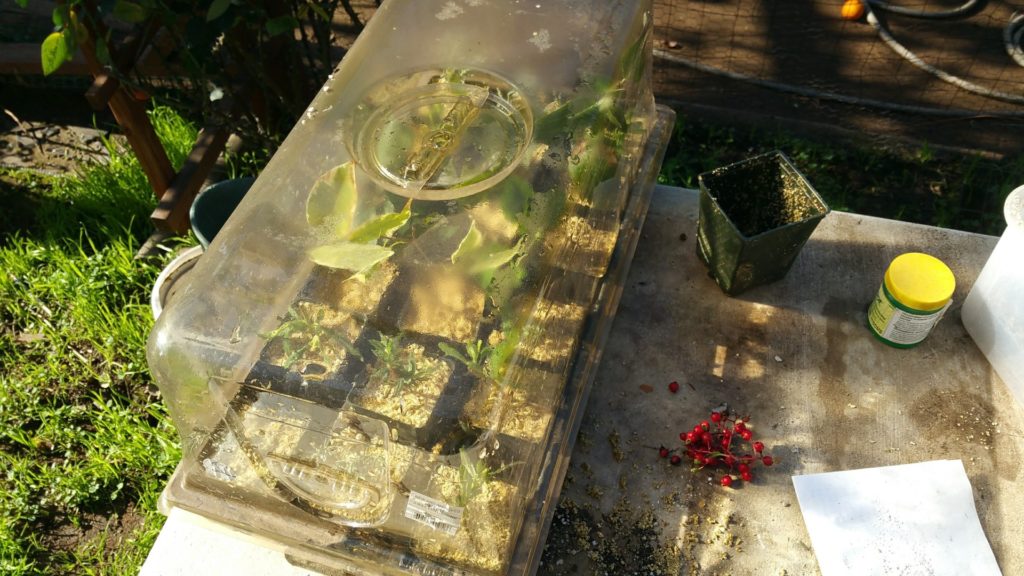
Once you’re done getting all your cuttings into the rooting medium, cover your container with the lid making sure the cutting’s leaves aren’t in contact with it. If you’re using a container that doesn’t have a lid, you can place the container in a plastic kitchen trash or similar bag and tie the bag shut. After the container is closed up, place it somewhere cool and out of direct sunlight.
Now forget about it.
Step 6 – Be patient
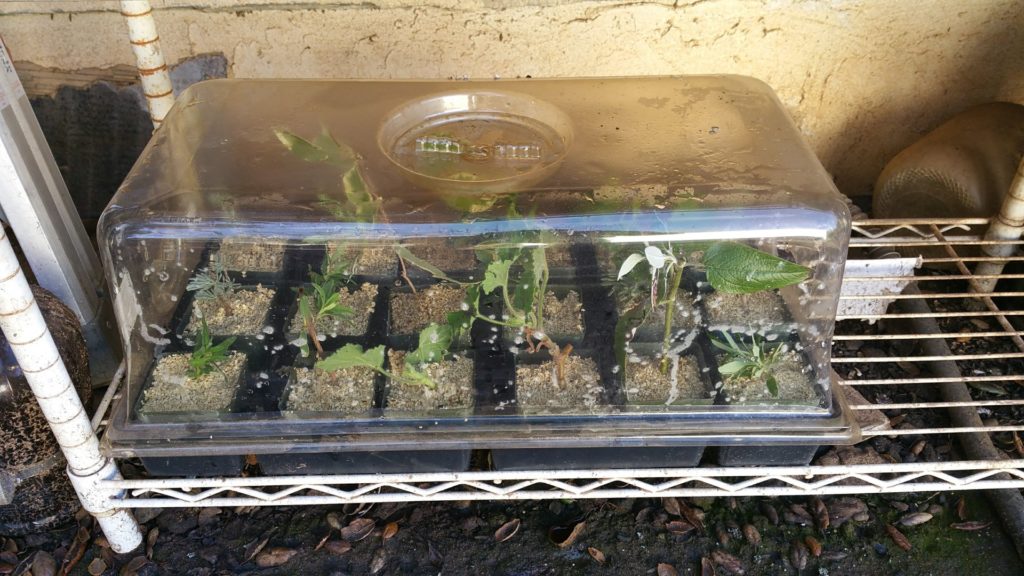
Over the next six weeks the cuttings will settle in and start to set roots. You can check on the cuttings from time-to-time and remove the ones that are obviously not taking (turning black, molding, etc.)*, but resist the temptation to poke around and disturb the medium. Also, you shouldn’t need to add water during this time, so, unless the vermiculite is bone dry, resist adding more water as well.
Step 7 – Transplant
If everything goes well, in six to eight weeks you’ll see your cuttings start to sprout new leaves and the stems adding some fresh, green growth. Once they’ve grown a couple of sets of new leaves, carefully lift them from the vermiculite avoiding damage to the roots (I use a table fork to do this), and transplant them into fresh potting soil. Then move the transplants to a location with dappled sunlight and let them get established. Once your transplants are looking healthy and happy, you can move them to their final location in the garden.
 Salvia Pozo Blue propagated from a cutting last year
Depending on the type of cutting, your new plants should be ready to hit the garden in late April or early May and looking gorgeous by mid-summer!
* Don’t worry if lots of your cuttings don’t root the first couple of times around. It happens. Just go get a few more cuttings and try again. Eventually you’ll figure out what works (and what doesn’t) and your success rate will go way up. I used to lose 2/3rds of my cuttings, but now that I’ve figured it out, I’ve got a better than 90% success rate.


