

Beat the Southwest Heat Wave: Build a DIY “Bucket” Swamp Cooler for About $50

My DIY swamp cooler keeping the family room cool
If you live anywhere in SoCal or the Southwest right now, you know the drill. There’s a monster high-pressure system parked over the Four Corners, pushing daytime temperatures well into the 90s (and high 80s right along the coast). To make matters worse, it’s dragging up sticky moisture from the Gulf of California.
When it gets this hot, running central AC isn’t just loud, with California’s current electricity rates, it feels like taking out a second mortgage just to get through August.
A few years ago, after balking at the $400 price tag for commercial evaporative coolers, I decided to build a simple DIY Bucket Swamp Cooler. The verdict? It actually works.
While it won’t drop a scorching room down to a crisp 72°F, it drastically slows down how fast your house heats up. Best of all, it runs on a single low-wattage desk fan (around 35 watts). You can run this thing all day for mere pennies of electricity.
Note: Thanks to inflation over the past few years, building this today costs closer to $50 than the original $30, but it’s still a microscopic fraction of what a portable AC unit—and its power bill—will cost you!
How It Works (The TL;DR)
This project uses a double-bucket setup. A desk fan mounted on the lid forces warm room air down into an outer bucket, surrounding an inner bucket packed with chilled water or ice jugs. The air picks up the chill, passes through the connecting pipes, and vents out into your living space as a refreshing breeze.

Diagram of a simple bucket swamp cooler
What You’ll Need
Pro-Tip: If you have leftover plumbing bits, paint buckets, or an old desk fan in the garage, your total cost will drop to almost nothing.
Supplies
- 2 Buckets with 1 Lid: One 10-gallon bucket with a lid, and one 5-gallon bucket (Or scale down to a 5-gallon and a 3-gallon for smaller rooms).
- Pipe (2-inch diameter): About 36 inches of 2-inch PVC or black ABS drain pipe.
- 1 Desk Fan: An inexpensive 11-inch or 12-inch desk fan (around 35 watts).
- Reusable Ice: Two 1-gallon water jugs, chilled in the fridge or frozen overnight.


Tools
- Drill
- ½-inch drill bit
- 2-inch hole saw bit
- Small hacksaw or jab saw
- Tape measure & pencil
Step-by-Step Build Guide
Step 1: Mark & Drill the Outer Bucket
-
- 1. Use your tape measure to mark three evenly spaced points around one side of the larger (10-gallon) bucket.
- 2. Attach your 2-inch hole saw bit to the drill and cut three clean holes.

Marked bucket ready to have holes drilled
Step 2: Drill the Inner Bucket
- Nest the smaller (5-gallon) bucket inside the larger one, centering it carefully. (Use a couple of scrap wood blocks or pipe offcuts to hold it centered if needed.)
- Using the holes in the outer bucket as your visual guide, drill three matching 2-inch holes into the inner bucket.


Step 3: Cut & Insert the Vent Pipes
- Cut your 2-inch pipe into three equal lengths (approx. 10 inches each).
- Pass the pipes through the outer holes into the inner bucket. Letting them extend about 10 inches helps direct and distribute the airflow much better into the room.


Step 4: Modify the Lid for the Fan
- Measure the face of your desk fan. You want to cut an opening in the 10-gallon lid that lets maximum airflow pass through without letting the fan body fall inside.
- Easy compass trick: Poke a small starter hole in the center of the lid, tie a pencil to a string, and trace a circle to match your fan’s size.
- Drill a access hole along the trace line, pop your hacksaw blade through, and cut out the circle.


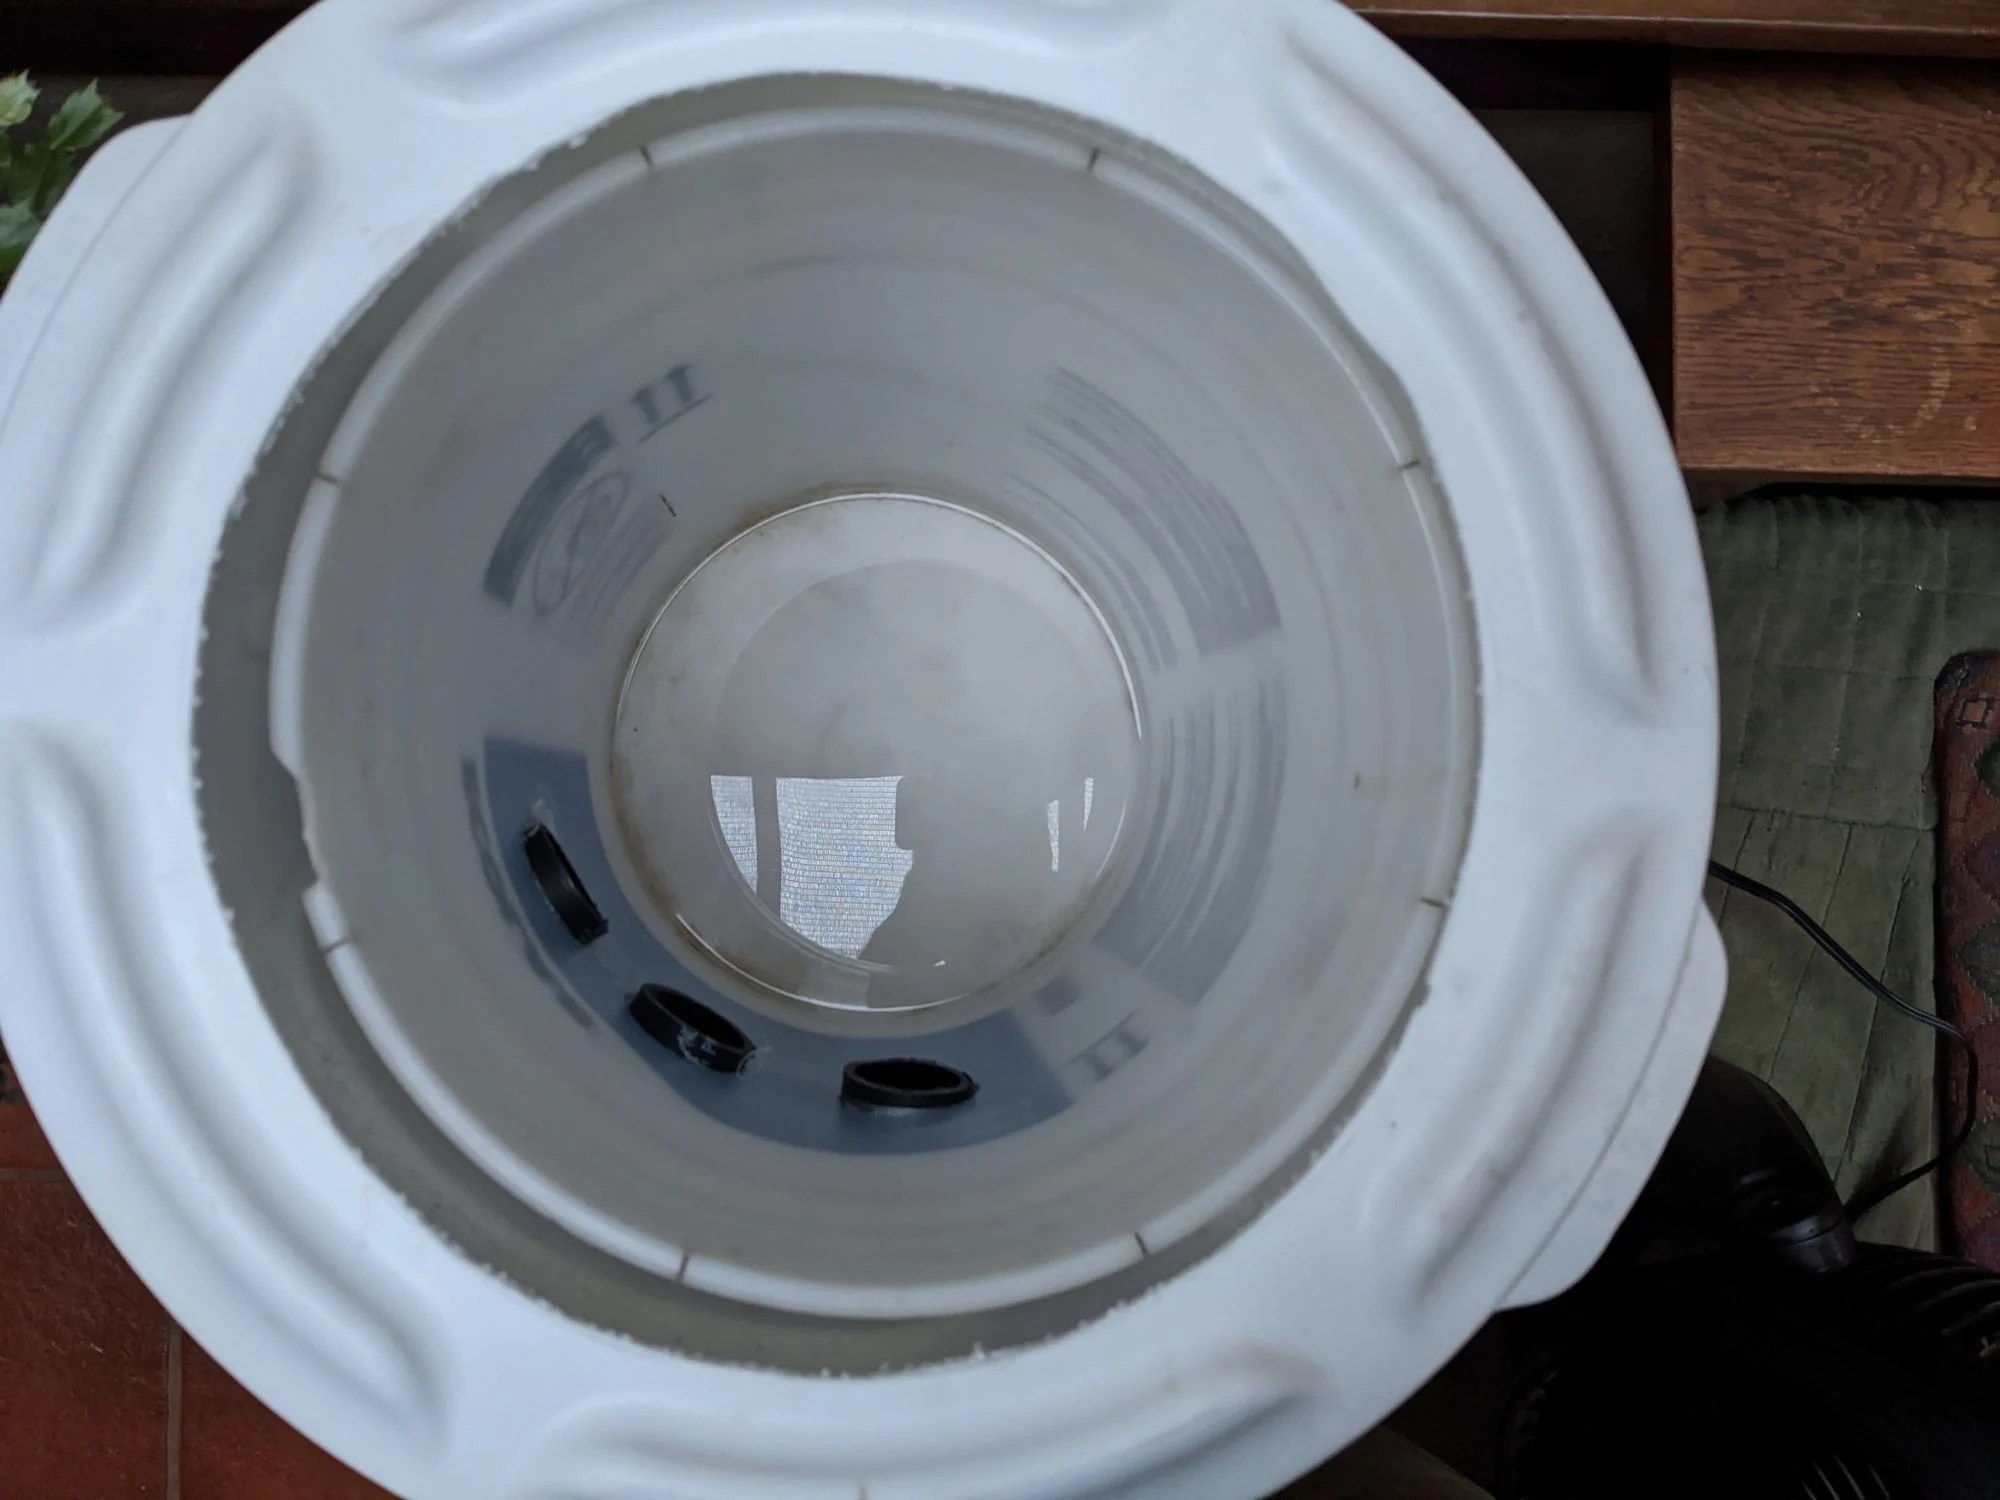
Step 5: Fire It Up!
- Position your new “swamp cooler” in the room where air can circulate freely (elevating it on a plant stand works great if you have pets or kids crawling around!).
- Place your frozen or chilled 1-gallon water jugs inside the inner bucket.
- Pop the lid on, place the desk fan face down over the opening, and turn it on high.

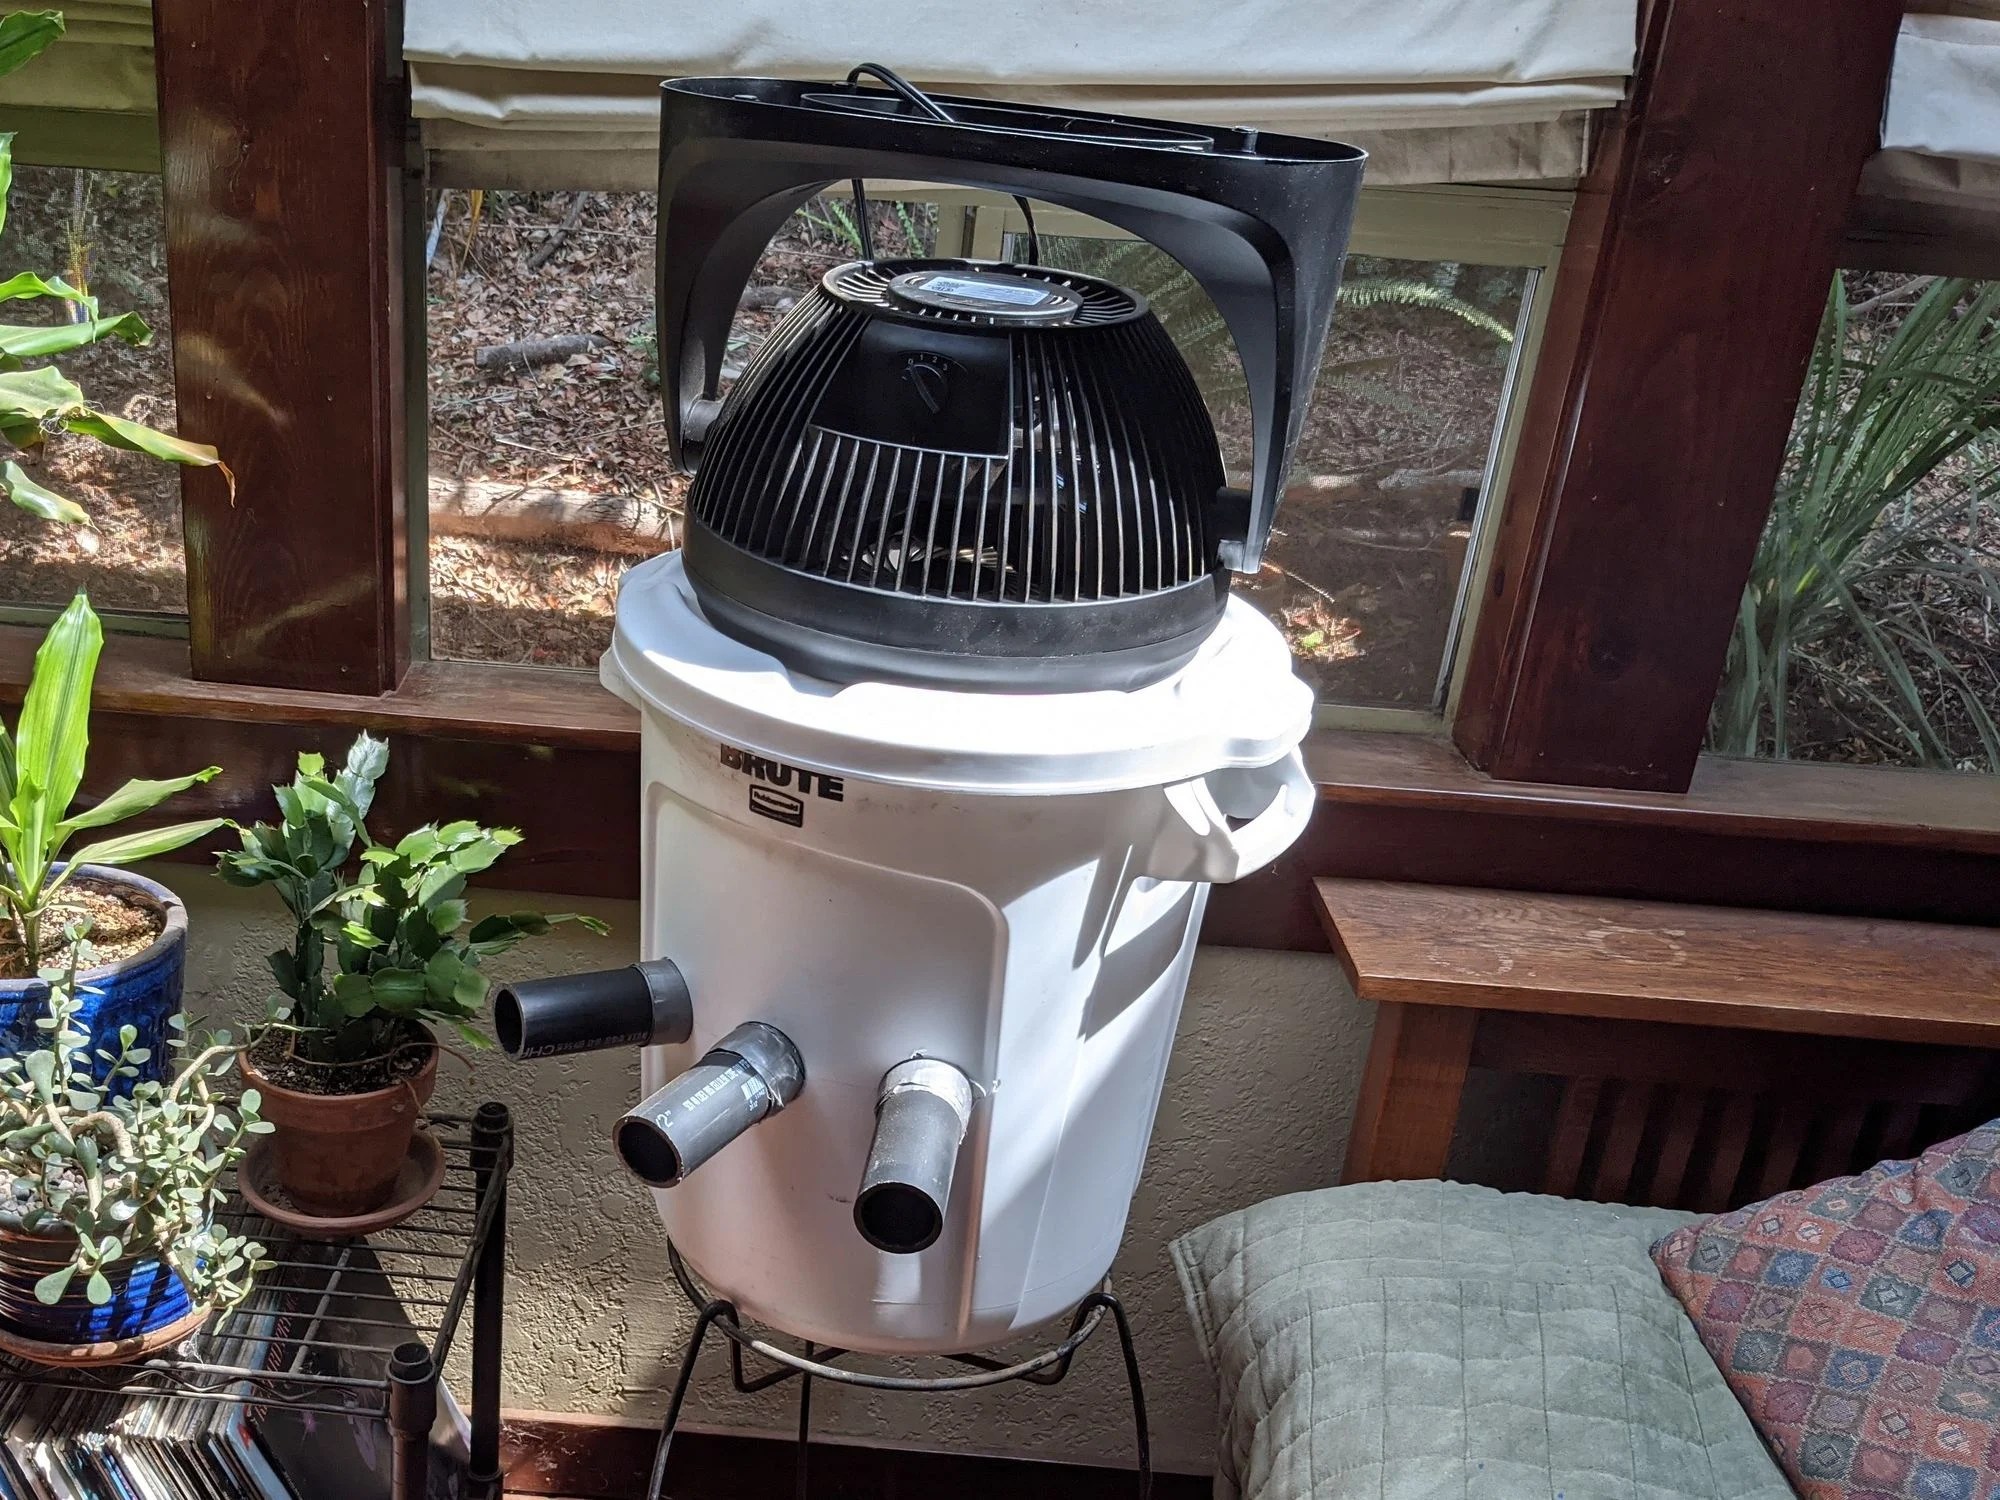
Boom—instant conditioned air!
Real-World Results: Does It Actually Work?
Short answer: Yes, absolutely—if you manage your expectations.
The Cooling Strategy
Our usual Southwest summer protocol is opening windows at night to capture the cool breeze, then closing everything up around 7:00 AM. Normally, even with shades down, indoor temperatures creep into the mid-to-high 80s by 2:00 PM.
The Test Run
During a brutal stretch of high-90s heat, we turned the bucket cooler on early in the morning right after locking down the house:
- Without the bucket cooler: Indoor temps rose by about 2°F every hour.
- With the bucket cooler: Indoor temps rose by less than 1°F every two hours.
Throughout a 5-day heatwave, our main living space never climbed above 82°F.
The Big Takeaway (Live & Learn)
Here’s the honest truth from real-world testing: This unit doesn’t chill a hot room down; it slows down how fast a cool room heats up.
Two gallons of frozen/chilled water reach room temperature in about 2 to 3 hours. If you wait until your living room is already an 88°F sauna to turn this on, it won’t do much. But if you start it early in the morning when the house is still cool, it acts as a thermal brake, holding back the heat until the sun starts setting in the evening.
For roughly $50 in parts and an afternoon of simple DIY work, it’s a game-changer for surviving humid Southwest heat waves on a budget!
About the Author: Sage Osterfeld


